Drive rack.stl
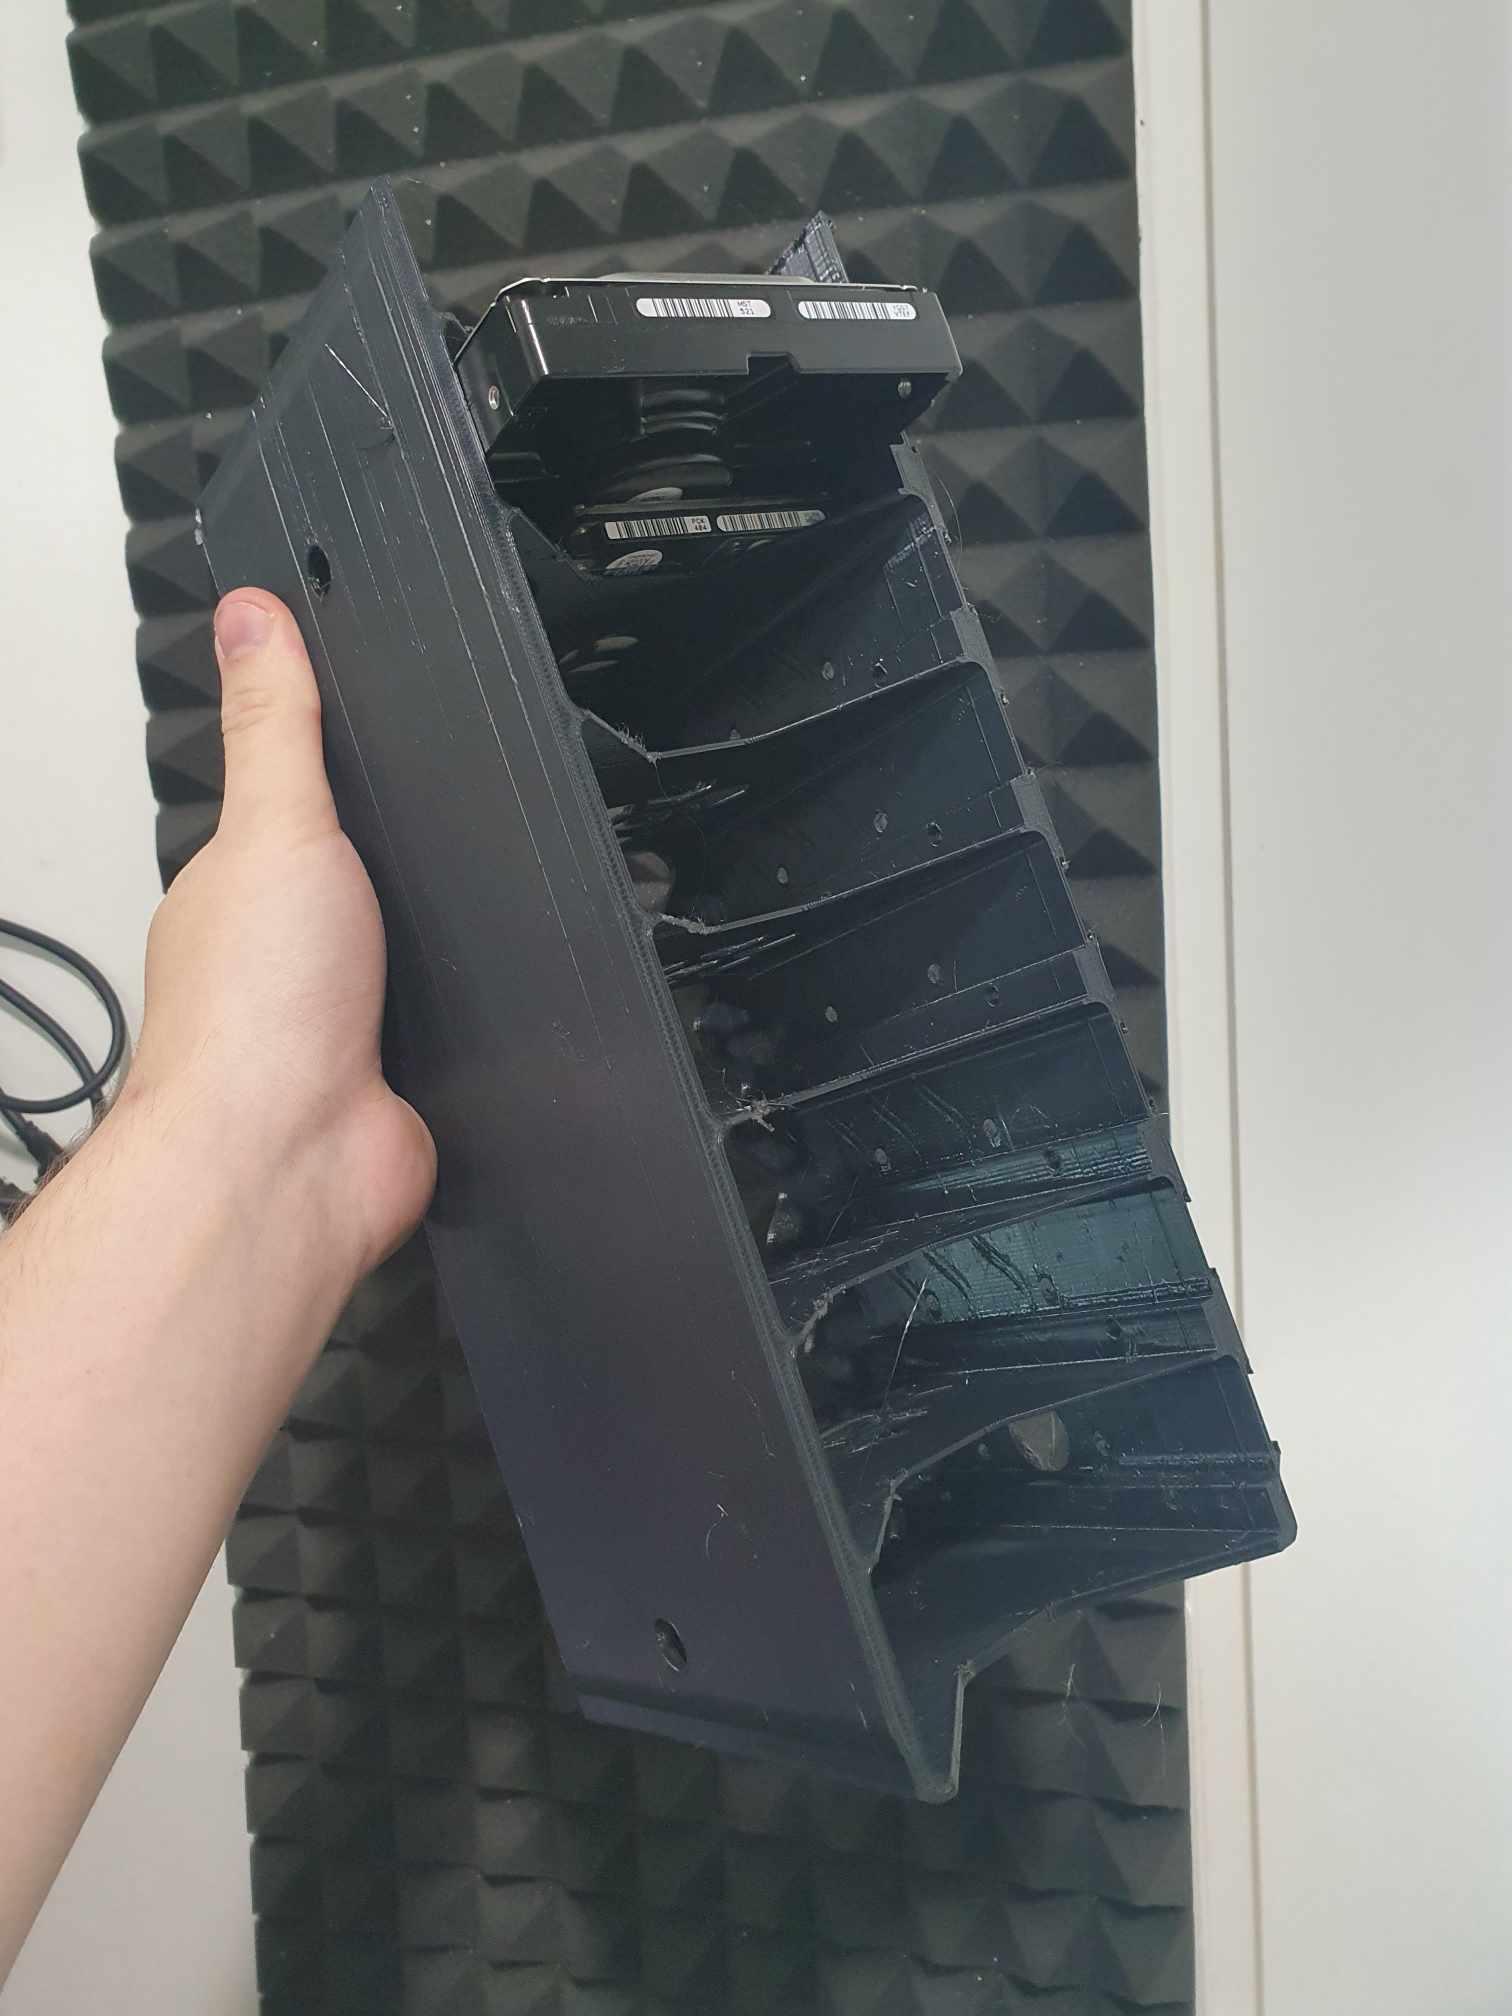
HDD drive rack I designed this rack to hold 16 drives in total. 8 3.5inch drives and 8 2.5inch drives. If you're anything like me. You have a pile of decent, salvaged drives lying around the house. With a rack like this, you can organize them neatly in one location and wire them into a JBOD storage.
Overview and features:
Drive mounting: Drives are slid into place and secured with two machine screws each. Big drive goes into the upper part of the compartment while the smaller drive goes to the lower part. For hot-swappable functionality. you could ignore screws and just install rubber pads to securely squish drives in and out of place. Note that drives wont fall through the back side because of the guard wall on the side so no need to worry. Drives do actually wobble around inside as there is a little extra space that can be used to glue some rubber/foam pads to dampen vibrations
Rack mounting: The whole print can free stand on a desk. it has a big footprint so it won't tip over very easily. But for me, I added two big holes to screw the whole rack to a surface vertically. A side of a desk in my case. with extra holes on the opposite side to allow easy screwdriver access.
Cooling: there are holes added to each compartment, both to save filament and to allow for airflow to at least cool the drives with convection. For a more efficient solution. you could easily mount a fan to the back with some self tapping screws.
Extra features: -There are semi-rings on the side wall which allow for some zipties or velcro straps to be used for routing cables. they are very strong due to the layer orientation. -each compartment has a small pocket for notes and labels. Just cut a 40x15mm piece of paper and slide it in. Its shape ensures that nothing will fall out.
Bonus: I'm adding the original .blend file. I use non-destructive workflow so you are free to edit the model for your preference. All Bolean modifiers are there.
Printing: this model is big (about 400g of PLA in my case) it just barely fits on a 30x30cm print bed, altough you could just print it in parts. the model is printed on its back side which has relatively small footprint. so i reccomend using a brim and some glue stick. Also make sure you dont allign the Z-Seam on the inside because any oozed filament and blobs might be hard to remove.


